Sunday, January 26, 2025

Handcrafted Vintage Wood Signs

Handcrafted Vintage Wood Signs: A Study in Rustic Elegance and Enduring Appeal

The allure of handcrafted vintage wood signs transcends mere signage; they represent a tangible connection to a bygone era, whispering tales of craftsmanship, history, and enduring aesthetics. These aren't simply indicators of location or business; they are curated artifacts, imbued with a unique character that elevates any space, from rustic farmhouses to contemporary lofts. This exploration delves into the artistry, history, and enduring appeal of handcrafted vintage wood signs, examining their production methods, stylistic variations, and the burgeoning collector's market they occupy.

The Genesis of Handcrafted Vintage Wood Signs: A Historical Perspective

The history of handcrafted wood signs stretches back centuries, interwoven with the evolution of commerce, communication, and artistic expression. Early examples, often crudely fashioned and painted, served a primarily functional purpose: to inform travelers of inns, taverns, and businesses. These rudimentary signs, employing simple lettering and basic imagery, laid the foundation for the more elaborate and aesthetically driven pieces that emerged later.

The Pre-Industrial Era: Rustic Simplicity and Functional Design

Prior to the advent of mass production, each sign was a unique creation, reflecting the skill and artistry of its maker. Materials were readily available and locally sourced: wood from nearby forests, paints derived from natural pigments, and lettering painstakingly hand-painted or carved. The designs were straightforward, often incorporating basic geometric shapes, rudimentary illustrations, and uncomplicated lettering styles. The focus was on clarity and durability, ensuring the sign effectively served its communicative purpose.

The Rise of Commercial Signage: Embracing Artistic Expression

As towns and cities grew, so did the demand for more sophisticated signage. The late 19th and early 20th centuries witnessed a flourishing of artistic expression in commercial signage. Sign painters, often highly skilled artisans, developed elaborate designs, incorporating intricate lettering styles, vibrant color palettes, and evocative imagery. This period saw the emergence of distinct regional styles, influenced by local artistic traditions and prevailing aesthetic trends. Techniques such as stenciling, gilding, and the use of raised lettering became increasingly prevalent, reflecting a growing appreciation for visual artistry.

The Impact of Technology: A Shift in Production Methods

The introduction of mass production techniques in the mid-20th century gradually diminished the prevalence of handcrafted wood signs. While printed signs offered greater efficiency and cost-effectiveness, the handcrafted tradition persisted, albeit on a smaller scale. Many artisans continued to produce bespoke signs, catering to clients seeking unique and personalized pieces. This period also saw the rise of neon signs, significantly impacting the landscape of commercial signage, although handcrafted wood signs retained their niche appeal.

The Art of Handcrafting: Materials, Techniques, and Styles

The creation of a handcrafted vintage wood sign is a meticulous process, requiring skill, patience, and a keen eye for detail. The choice of materials, the execution of techniques, and the overall design contribute to the sign's unique character and enduring appeal.

Material Selection: The Foundation of Durability and Aesthetics

The selection of wood is critical. Durable hardwoods, such as oak, pine, and cedar, were traditionally favored for their strength and resistance to weathering. The wood's grain and texture play a significant role in the final aesthetic. The choice of paint also impacts the sign's appearance, with oil-based paints offering a richer, more durable finish than water-based alternatives. Hardware, such as nails, brackets, and chains, were often chosen for their robustness and aesthetic compatibility with the overall design.

Crafting Techniques: From Hand-Carving to Precision Painting

Hand-carving remains a cornerstone of handcrafted sign production, enabling the creation of intricate designs and three-dimensional elements. Painstakingly rendered lettering, often employing distinct fonts and styles, is a testament to the artist's skill. Painting techniques range from simple brushstrokes to complex layering and shading, creating depth and visual interest. Stencils were often used to ensure uniformity in lettering, while gilding provided accents of richness and elegance.

Stylistic Variations: A Reflection of Time and Place

Handcrafted vintage wood signs exhibit a remarkable diversity of styles, reflecting the era in which they were made and the regional influences that shaped their aesthetic. Examples include:

  • Rustic Farmhouse Style: Characterized by simple lettering, natural wood tones, and often featuring images of farm animals or tools.
  • Victorian Era Style: Distinguished by ornate lettering, intricate embellishments, and the use of vibrant colors.
  • Art Deco Style: Featuring geometric shapes, stylized lettering, and a focus on clean lines and symmetry.
  • Retro Style: Embracing the bold colors and stylized graphics of the mid-20th century.

These stylistic variations add to the collector's appeal of these signs, each one a unique window into a specific period and design sensibility.

The Enduring Appeal: Collecting and Preserving Handcrafted Vintage Wood Signs

The enduring appeal of handcrafted vintage wood signs extends beyond their aesthetic value; they represent a connection to the past, a tangible piece of history, and a testament to the artistry of bygone eras. Their rustic charm, unique character, and the stories they seem to whisper have captivated collectors and enthusiasts for decades.

The Collector's Market: A Growing Appreciation for Rustic Elegance

The collector's market for handcrafted vintage wood signs has experienced a significant surge in recent years, driven by a growing appreciation for vintage items and a renewed interest in rustic aesthetics. Collectors seek out signs for their historical significance, their artistic merit, and their potential as decorative elements. Rarity, condition, and stylistic appeal are key factors influencing value, with exceptional pieces commanding substantial prices.

Preservation and Restoration: Ensuring the Longevity of Handcrafted Artifacts

Preserving the integrity of handcrafted vintage wood signs is crucial for maintaining their historical and aesthetic value. Careful cleaning, proper storage, and occasional restoration work are essential to mitigating the effects of age and environmental factors. Professional restoration is recommended for significant repairs, ensuring that the work is undertaken with respect for the sign's original character and craftsmanship. The goal is to ensure that these pieces of history endure for generations to come, continuing to tell their stories and inspire appreciation for the art of handcrafted design.

In conclusion, handcrafted vintage wood signs stand as eloquent testaments to enduring craftsmanship and artistic expression. Their historical significance, aesthetic appeal, and growing collector's market ensure that these remarkable artifacts will continue to captivate audiences for many years to come, serving as a tangible link to the past and a reminder of the artistry inherent in even the most functional objects. Their rustic charm, unique character, and potential for telling stories make them highly prized possessions, and their preservation is a testament to the respect we hold for the artistry and ingenuity of past generations.

Saturday, January 25, 2025

Personalized Wooden Wall Signs with Family Names

Personalized Wooden Wall Signs: A Timeless Expression of Family Heritage

In the realm of home décor, few items possess the enduring charm and personal significance of a handcrafted wooden wall sign. Beyond mere ornamentation, these signs serve as powerful symbols of family identity, proudly displaying surnames and creating a tangible connection to heritage and legacy. This detailed exploration delves into the artistry, customization options, and enduring appeal of personalized wooden wall signs featuring family names, examining their role in modern home aesthetics and their potential as treasured heirlooms.

The Allure of Personalized Wooden Wall Signs

The appeal of personalized wooden wall signs transcends fleeting trends. Their enduring popularity stems from a confluence of factors, encompassing both aesthetic and sentimental value. The inherent warmth and natural beauty of wood create an inviting atmosphere, infusing any space with rustic charm or sophisticated elegance, depending on the chosen style and finish. The tactile quality of wood, its unique grain patterns, and the subtle variations in color contribute to a sense of authenticity and craftsmanship that is difficult to replicate with other materials.

Aesthetic Versatility and Design Options

The versatility of wooden wall signs allows for seamless integration into diverse interior design schemes. From minimalist modern settings to traditional farmhouse styles, and even eclectic bohemian spaces, a well-chosen sign can enhance the overall aesthetic. Design options abound, with choices ranging from simple, clean fonts to ornate script, intricate carvings, and the incorporation of decorative elements. The wood itself can be treated in numerous ways, achieving a variety of finishes, including:

  • Natural finish: Showcasing the wood's natural beauty and grain.
  • Stained finish: Adding depth and richness with various shades and tones.
  • Painted finish: Offering a vibrant palette of colors to complement existing décor.
  • Distressed finish: Creating a weathered, antique appearance that adds character and charm.

Furthermore, the size and shape of the sign can be customized to suit the available wall space and the desired impact. Large, statement pieces can become focal points, while smaller, more delicate signs can add subtle touches of personality to a room.

Sentimental Value and Family Legacy

Beyond their aesthetic appeal, personalized wooden wall signs carry profound sentimental value. The family name, meticulously crafted into the wood, becomes a tangible representation of heritage and belonging. It acts as a constant reminder of family history, connecting present generations to their ancestors and fostering a sense of continuity. These signs can serve as cherished heirlooms, passed down through generations, carrying with them stories and memories associated with the family and the home they adorn.

The act of selecting a design, choosing a font, and specifying the family name is itself a meaningful process, allowing for personalized expression and creative involvement. This personal touch elevates the sign beyond a simple decorative item, transforming it into a deeply personal artifact reflecting the unique identity of the family.

Crafting the Perfect Personalized Wooden Wall Sign

The creation of a truly exceptional personalized wooden wall sign requires careful consideration of several key factors. From material selection to design choices and finishing techniques, each element contributes to the overall quality and aesthetic impact of the finished product.

Choosing the Right Wood

The type of wood used significantly impacts the appearance, durability, and overall feel of the sign. Popular choices include:

  • Pine: A readily available and relatively affordable option with a light, warm tone.
  • Oak: A classic choice known for its strength, durability, and rich, distinctive grain.
  • Walnut: A luxurious option with a deep, dark color and beautiful grain patterns.
  • Cherry: A reddish-brown wood that develops a rich patina over time.

The choice of wood should align with the desired aesthetic and the overall style of the home. For a rustic look, pine or reclaimed wood might be ideal, while a more formal setting might call for the elegance of oak or walnut.

Font Selection and Lettering Techniques

The font chosen for the family name plays a crucial role in the sign's overall aesthetic. The font should complement the style of the wood and the overall design. Options range from classic serif fonts to modern sans-serif fonts, script styles, and even custom-designed lettering. The lettering technique also impacts the final look. Options include:

  • Hand-painted lettering: Providing a unique, handcrafted touch.
  • Laser engraving: Creating crisp, clean lines and intricate designs.
  • Router carving: Allowing for three-dimensional lettering and decorative elements.

Finishing Touches and Customization Options

Beyond the primary lettering, various finishing touches can enhance the sign's appeal. These can include:

  • Adding decorative elements: Incorporating designs, symbols, or imagery related to the family's history or interests.
  • Incorporating a family crest or monogram: Adding a touch of heraldic tradition.
  • Using different wood stains or paints: Creating a unique color scheme to match existing décor.
  • Adding a protective sealant: Ensuring the sign's longevity and preserving its beauty.

The Enduring Legacy of Personalized Wooden Wall Signs

Personalized wooden wall signs transcend mere decorative objects; they become cherished family heirlooms, carrying with them the weight of generations and the echoes of countless memories. They are tangible representations of family history, proudly displayed within the home, serving as a constant reminder of roots and heritage. The careful selection of materials, the thoughtful design process, and the meticulous craftsmanship involved in creating these signs all contribute to their enduring appeal and their ability to seamlessly integrate into the modern home. More than just a piece of décor, a personalized wooden wall sign is a testament to family, legacy, and the enduring power of connection.

As styles evolve and trends come and go, the timeless elegance and enduring sentimentality of a personalized wooden wall sign remain steadfast. It is an investment not merely in home décor, but in the preservation of family history and the creation of lasting memories, ensuring that the family name will be proudly displayed and celebrated for generations to come.

Wednesday, November 20, 2024

Profitable Bird Feeder Ideas for Beginners to Build and Sell

Profitable Bird Feeder Ideas for Beginners to Build and Sell

Profitable Bird Feeder Ideas for Beginners to Build and Sell

The world of birdwatching is a delightful hobby that brings joy to many. If you’re looking for a creative and rewarding side hustle, consider building and selling bird feeders. This venture requires minimal investment and can be tailored to your skillset and creativity. Here are some profitable bird feeder ideas perfect for beginners, allowing you to tap into this growing market.

Simple and Elegant: The Classic Bird Feeder

Start with the basics! A classic bird feeder is a timeless design that appeals to a wide range of customers. You can easily find affordable wood or recycled materials at local hardware stores or even repurpose old wooden crates. Here's how to create your classic bird feeder:

Materials:

  • Wooden board or crate
  • Screws and drill
  • Birdseed tray or a simple wooden platform
  • Weatherproof paint or stain (optional)

Instructions:

  1. Cut the wooden board to the desired size for your feeder.
  2. Attach the birdseed tray or platform to the board, ensuring it’s sturdy.
  3. Drill small holes or slots around the perimeter to create perches for birds.
  4. Apply paint or stain for a protective finish and enhance the aesthetics.

Upcycled Charm: Repurposed Containers

Give new life to old containers and demonstrate your commitment to sustainability. Repurposed feeders are trendy and attract environmentally conscious buyers. You can use:

  • Tin cans: Clean and decorate tin cans with paint, stencils, or decoupage techniques.
  • Wine bottles: Create hanging feeders by cutting the top of wine bottles and attaching a platform for birdseed.
  • Plastic jugs: Drill drainage holes in the sides and create perches around the top, providing easy access for birds.

Creative and Functional: Unique Feeder Designs

Break away from the ordinary and craft feeders with unique shapes and features. Consider these ideas to capture attention and stand out in the market:

  • Squirrel-proof feeders: Design feeders with features that prevent squirrels from accessing the birdseed, such as baffles or hanging feeders with cages.
  • Hummingbird feeders: Create colorful and attractive feeders specifically for hummingbirds using clear plastic bottles or specially designed hummingbird feeders.
  • Platform feeders: Build sturdy platforms for birds to enjoy larger seeds, like sunflower seeds and peanuts.

Marketing and Selling Your Bird Feeders

Once you’ve crafted your feeders, it’s time to bring them to market! Here are some tips for selling your creations:

  • Online Marketplaces: Etsy, Amazon Handmade, and Facebook Marketplace are great platforms to reach a wider audience.
  • Local Craft Fairs and Events: Engage directly with customers and showcase your feeders at local fairs and markets.
  • Social Media: Utilize Instagram and Facebook to create visually appealing content that highlights your unique feeders and attracts customers.
  • Word-of-Mouth: Encourage satisfied customers to spread the word about your business by offering referral programs or discounts.

Building and selling bird feeders can be a fulfilling and profitable venture. By embracing your creativity and adapting these ideas to suit your skills, you can establish a successful business in a niche market. Remember to focus on quality craftsmanship, unique designs, and excellent customer service to stand out and attract loyal customers.

DIY Wooden Jewelry Boxes with Customizable Compartments

DIY Wooden Jewelry Boxes with Customizable Compartments

DIY Wooden Jewelry Boxes with Customizable Compartments

Crafting a personalized jewelry box offers a rewarding and fulfilling woodworking project. This guide will guide you through the process of building a wooden jewelry box with customizable compartments, allowing you to tailor it perfectly to your specific needs and preferences. From selecting materials to finishing touches, we will cover every step in detail.

Materials and Tools

Before embarking on this project, ensure you have the necessary materials and tools readily available. This list provides a comprehensive overview:

Materials

  • Wood: Choose a hardwood like maple, cherry, or walnut for durability and aesthetic appeal. Alternatively, plywood can be used for a more budget-friendly option.
  • Wood glue: A high-quality wood glue is essential for strong and durable bonds.
  • Finishing materials: Select a stain, paint, or varnish based on your desired look and protection level.
  • Hardware: Hinges, a latch or lock, and decorative knobs or handles.
  • Felt or lining fabric: Soft materials for lining the interior compartments and preventing scratches.
  • Dividers: Thin wood strips or cardboard for creating compartments within the box.

Tools

  • Table saw: For cutting the wood to size and creating precise cuts.
  • Miter saw: For making accurate angled cuts for the box frame.
  • Router: For creating decorative edges and grooves.
  • Drill press: For drilling holes for hinges, latch, and knobs.
  • Sandpaper: Various grits for smoothing surfaces and removing imperfections.
  • Clamps: For securing wood pieces during assembly and gluing.
  • Measuring tape: For accurate measurements and planning.
  • Pencil: For marking cuts and design elements.

Design and Planning

The first step in creating a customized jewelry box is to carefully plan its design. Consider the following factors:

Size and Shape

Determine the desired dimensions of the box, taking into account the amount of jewelry you want to store. Consider a rectangular or square shape for a classic look, or explore more intricate designs like a hexagon or octagon.

Compartment Layout

Sketch out the layout of the compartments, keeping in mind the size and types of jewelry you plan to store. Consider dedicated spaces for rings, necklaces, earrings, bracelets, and other accessories.

Depth and Height

Decide on the appropriate depth and height of the compartments based on the jewelry you will be storing. Ensure sufficient space to accommodate larger pieces and prevent items from getting tangled.

Exterior Design

Choose a finishing style for the exterior of the box. Consider using a natural wood finish, painting it a specific color, or adding decorative details such as inlays, carvings, or laser etching.

Construction

With your design finalized, it's time to start construction. Follow these steps:

Cutting the Wood

Cut the wood panels to the desired size using a table saw or miter saw. Use accurate measurements and double-check your cuts before proceeding.

Assembling the Box Frame

Create the box frame by joining the side panels, top, and bottom. Use wood glue and clamps to secure the joints, ensuring a tight and square fit. If desired, add decorative details like mitered corners or rounded edges.

Adding Interior Compartments

Install dividers to create compartments within the box. Use thin wood strips or cardboard for this purpose, ensuring they are securely attached using glue or screws.

Attaching the Hinges and Latch

Drill holes for the hinges using a drill press and attach them to the box frame. Use screws for a secure attachment. Install the latch or lock on the opposite side of the box, ensuring proper alignment.

Adding a Bottom

Cut a bottom panel to fit the interior of the box and attach it using glue or screws. Ensure the bottom is flush with the sides of the box.

Finishing Touches

Once the construction is complete, it's time to add the final touches to your jewelry box.

Sanding and Finishing

Sand all surfaces smooth using sandpaper of varying grits, starting with a coarser grit and gradually progressing to a finer one. Apply the desired stain, paint, or varnish, following the manufacturer's instructions.

Lining the Interior

Cut pieces of felt or lining fabric to fit the interior of the box and compartments. Use glue or adhesive tape to attach the lining, creating a soft and protective surface for your jewelry.

Adding Hardware

Install knobs or handles on the box lid or front. If using a latch or lock, ensure it is properly installed and functions smoothly.

Final Inspection

Carefully inspect the finished jewelry box for any imperfections or loose parts. Make any necessary adjustments to ensure it is ready for use.

Tips and Suggestions

  • Consider adding a small mirror to the inside of the lid for easier viewing of jewelry.
  • Use felt-lined dividers or trays to create separate compartments for different types of jewelry.
  • Add a drawer to the bottom of the box for additional storage.
  • Experiment with different wood types and finishes to create a unique and personalized design.
  • Don't be afraid to get creative and experiment with different designs and techniques.

Conclusion

Building a DIY wooden jewelry box with customizable compartments allows you to create a functional and aesthetically pleasing piece of furniture that perfectly suits your needs. By following this guide, you can turn your woodworking skills into a cherished and personalized storage solution for your precious jewelry.

Tuesday, November 19, 2024

How to Make Wooden Chess Tables with Custom Features for Extra Profit

How to Make Wooden Chess Tables with Custom Features for Extra Profit

Crafting Custom Wooden Chess Tables for Enhanced Profitability

The chess table market is brimming with potential for skilled woodworkers seeking to generate substantial profit. Offering custom-designed chess tables with unique features allows you to differentiate your products, cater to specific client needs, and command premium prices. This comprehensive guide outlines the key steps involved in building custom wooden chess tables, incorporating captivating features that will elevate your creations and ensure lucrative returns.

Understanding the Market and Your Target Audience

Before embarking on your custom chess table venture, it is crucial to understand the market dynamics and identify your target audience. Conduct thorough research to determine the prevailing trends, popular styles, and price points. Consider factors such as:

  • Target demographic: Are you aiming for hobbyists, competitive players, or collectors?
  • Budget range: What price points are your target customers willing to pay for custom-designed tables?
  • Desired features: What features do customers prioritize, such as storage compartments, intricate carvings, or specialized playing surfaces?
  • Competitor analysis: Identify your competitors, their pricing strategies, and unique selling propositions.

By understanding your target market, you can tailor your designs, pricing, and marketing efforts to effectively reach your ideal customers.

Designing Custom Chess Tables with Unique Features

The key to commanding higher prices for your custom chess tables lies in offering unique and desirable features that set your creations apart. Here are some compelling ideas for custom features:

Aesthetic Enhancements

  • Intricate Carvings: Incorporate elaborate carvings on the table legs, borders, or even the chessboard itself. Consider themes like dragons, mythical creatures, or intricate floral patterns.
  • Hand-Painted Designs: Employ skilled artisans to paint custom designs on the table surface, borders, or even the chess pieces. This adds an element of personalized art to your creation.
  • Inlays and Veneers: Use contrasting wood species, precious metals, or colorful stone inlays to create striking patterns and textures on the playing surface or table top.
  • Unique Shapes and Styles: Explore non-traditional table shapes like octagons or rounded rectangles. Design unique table legs, incorporating elegant curves or stylized motifs.

Functional Features

  • Storage Compartments: Integrate hidden compartments within the table for storing chess pieces, game books, or other accessories.
  • Drawers and Cabinets: Create functional drawers beneath the playing surface to house chess sets, score sheets, or personal items.
  • LED Lighting: Incorporate strategically placed LED lighting to illuminate the chessboard, providing a dramatic and practical feature for evening play.
  • Built-in Scoreboard: Design a fold-out or retractable scoreboard integrated into the table for easy tracking of the game.
  • Customizable Chessboard: Offer options for different wood species, sizes, or even personalized engravings on the chessboard itself.

Choosing the Right Materials and Construction Techniques

The materials and construction techniques you employ will significantly impact the quality, durability, and overall aesthetic of your custom chess tables. Consider the following factors:

Wood Species

  • Hardwoods: Opt for durable and visually appealing hardwoods like oak, walnut, cherry, or maple. These woods offer strength, stability, and beautiful grain patterns.
  • Exotic Woods: For a truly luxurious feel, consider incorporating exotic hardwoods like mahogany, ebony, or rosewood. These woods add an air of elegance and exclusivity.
  • Wood Veneers: Use wood veneers to create visually stunning patterns and textures on the table surface, while maintaining affordability.

Construction Techniques

  • Mortise and Tenon Joints: These strong and traditional joints provide a sturdy foundation for the table.
  • Dovetail Joints: Dovetail joints offer exceptional strength and are often used for constructing drawers or cabinet compartments.
  • Glue and Screw Assembly: This technique can be used for securing various table components, ensuring a robust and reliable construction.

Pricing Your Custom Chess Tables

Determining the right price for your custom chess tables is crucial for maximizing profitability. Consider the following factors:

  • Cost of Materials: Calculate the cost of all materials used, including wood, hardware, finishes, and any specialty components.
  • Labor Costs: Account for the time invested in design, fabrication, assembly, and finishing. Factor in your hourly rate or labor costs per project.
  • Custom Features: Assign a premium price for custom features, such as intricate carvings, hand-painted designs, or specialized storage compartments.
  • Competitive Pricing: Research the pricing of comparable custom chess tables in the market to establish a competitive yet profitable price point.
  • Profit Margin: Determine a desirable profit margin that covers your overhead costs and provides a reasonable return on your investment.

Marketing and Selling Your Custom Chess Tables

Once you have crafted exquisite custom chess tables, it's time to market and sell your creations effectively. Here are some proven strategies:

  • Online Presence: Establish a professional website or online storefront to showcase your work, highlight your unique features, and provide detailed product information.
  • Social Media Marketing: Utilize platforms like Instagram, Facebook, or Pinterest to showcase your creations, engage with potential customers, and build a strong brand identity.
  • Online Marketplaces: List your custom chess tables on platforms like Etsy, eBay, or specialized woodworking marketplaces to reach a wider audience.
  • Local Craft Fairs and Art Shows: Participate in local events to showcase your handcrafted chess tables and engage directly with potential buyers.
  • Partnerships and Collaborations: Explore collaborations with local art galleries, furniture stores, or chess clubs to expand your reach and generate leads.

Conclusion

Crafting custom wooden chess tables offers a lucrative opportunity for skilled woodworkers to express their creativity, cater to individual needs, and generate substantial profit. By understanding the market, incorporating unique features, choosing the right materials and construction techniques, and implementing effective marketing strategies, you can establish a thriving business that caters to the growing demand for exquisite and personalized chess tables.

Monday, November 18, 2024

DIY Wood Wall Clocks That Are Perfect for Gifts and Special Occasions

DIY Wood Wall Clocks That Are Perfect for Gifts and Special Occasions

DIY Wood Wall Clocks: Unique Gifts for Every Occasion

Looking for a thoughtful and personalized gift that's sure to impress? Look no further than a DIY wood wall clock! These charming timepieces add a touch of warmth and character to any space, and they're incredibly versatile. Whether you're celebrating a birthday, housewarming, or just want to show someone you care, a handcrafted wood clock is a unique and meaningful present that's sure to be cherished for years to come.

Why Choose a DIY Wood Wall Clock?

There are many reasons why DIY wood wall clocks make such wonderful gifts:

  • Uniqueness: Each clock is a one-of-a-kind creation, reflecting your personal touch and the recipient's taste.
  • Personalization: Customize the design with special colors, engravings, or even family photos, making it an extra-special treasure.
  • Thoughtfulness: The time and effort you put into crafting the clock will be truly appreciated by the recipient.
  • Sustainability: By using wood, you're opting for an eco-friendly material that adds a touch of natural beauty to the home.
  • Affordability: Compared to store-bought clocks, DIY versions are surprisingly budget-friendly, letting you save money while creating something truly special.

Getting Started: Essential Supplies and Tools

Before you begin your crafting adventure, gather the necessary supplies and tools. You'll need:

  • Wood: Choose a sturdy wood like plywood or MDF for the base of your clock. Pine and birch are also popular choices.
  • Clock Mechanism: This includes the hands, the movement, and a mounting nut. You can find these at most craft stores or online.
  • Sandpaper: Use different grits (fine and coarse) to smooth out the wood and create a polished finish.
  • Wood Stain or Paint: Opt for a color that complements the recipient's decor or reflects their personal style.
  • Brushes or Sprayer: These will help you apply stain or paint evenly.
  • Clear Coat: A protective layer of sealant, like polyurethane, protects the wood and enhances its longevity.
  • Drill and Drill Bits: Necessary for making the hole for the clock mechanism and any decorative elements.
  • Pencil: For marking out design elements and making measurements.
  • Measuring Tape: To ensure accurate sizing and placement of components.
  • Safety Glasses and Gloves: For protecting yourself while working with power tools and wood.

Design Ideas: Unleash Your Creativity

The beauty of DIY wood wall clocks lies in the endless design possibilities. Let your creativity flow and personalize your clock according to your preferences. Here are some inspirational ideas to get you started:

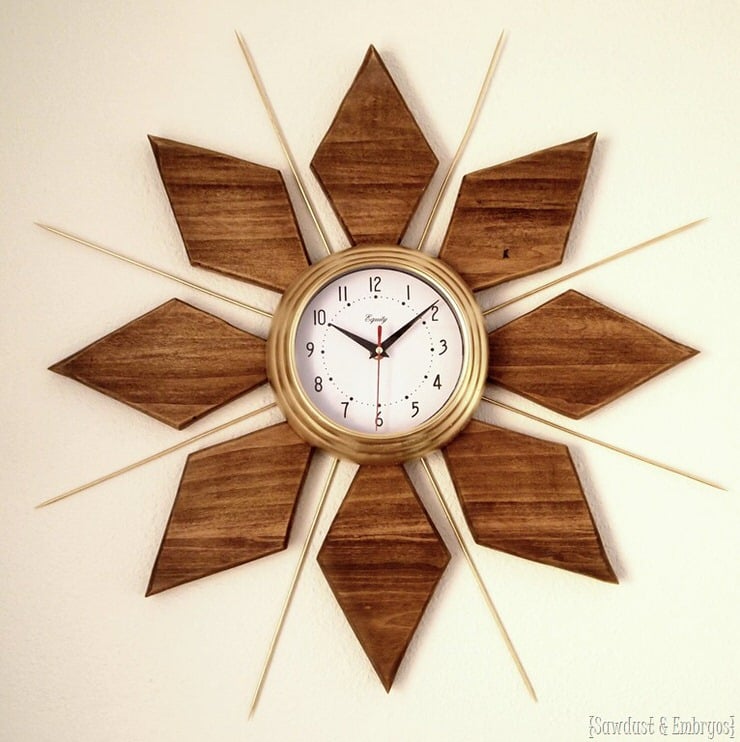
  • Geometric Patterns: Create a striking visual with bold geometric shapes cut from wood and arranged in a unique design.
  • Natural Elements: Incorporate elements like wood slices, bark, or dried flowers for a rustic and organic look.
  • Personalized Messages: Engrave a meaningful quote, a loved one's name, or a special date for a truly sentimental touch.
  • Upcycled Wood: Give old wooden pieces a new life by incorporating them into your clock design.
  • Family Photos: Create a unique photo clock by using a wood base as a frame for favorite family pictures.

Step-by-Step Guide: Crafting Your Masterpiece

Once you've gathered your supplies and chosen your design, it's time to craft your wood wall clock. Follow these steps for a successful project:

1. Prepare the Wood Base:

Cut the wood to your desired size and shape. Sand the edges and surfaces thoroughly to create a smooth, even finish.

2. Apply Stain or Paint:

If you're using stain, apply a thin layer to the wood and allow it to dry completely. For paint, apply two coats, letting each layer dry before applying the next.

3. Design and Cut:

If your design includes intricate shapes or cuts, use a jigsaw or scroll saw to cut out the desired shapes. Be sure to wear safety glasses and work carefully.

4. Add Decorative Elements:

Apply any additional decorative elements like wood slices, beads, or small metal pieces. Secure these using glue or screws.

5. Attach the Clock Mechanism:

Use a pencil to mark the center of the clock base. Drill a hole large enough to accommodate the mounting nut. Secure the clock mechanism in place using the provided nut.

6. Apply a Protective Coat:

Finish the clock by applying a layer of clear coat, such as polyurethane, to protect the wood and enhance its durability.

7. Hang Your Clock:

Attach a hanger or hook to the back of the clock for easy hanging.

Crafting Tips for Beginners

Making a wood wall clock is a rewarding experience, even for beginners. Here are a few helpful tips:

  • Start Simple: If you're new to woodworking, begin with a basic design and gradually work your way up to more complex creations.
  • Practice on Scrap Wood: Test your cutting and sanding techniques on scrap pieces of wood before working on the actual clock base.
  • Use Templates: Utilize stencils or templates to help you create precise shapes and patterns.
  • Seek Inspiration: Browse online and in magazines for ideas and techniques to spark your creativity.

Beyond Gifts: DIY Wood Wall Clocks for Your Home

Not only are DIY wood wall clocks fantastic gifts, but they're also a wonderful way to personalize your own home decor. Create a statement piece for your living room, a cozy clock for your bedroom, or a whimsical timepiece for your child's room. The possibilities are endless!

Wednesday, November 13, 2024

How to Create Floating Shelves with a Vintage or Coastal Style

How to Create Floating Shelves with a Vintage or Coastal Style

How to Create Floating Shelves with a Vintage or Coastal Style

Hey there, DIY enthusiasts! Ready to add some personality and storage space to your home? Floating shelves are a fantastic way to do just that. And when you give them a vintage or coastal twist, they become real conversation starters. Let's dive into creating some stylish shelves together!

Choosing the Right Wood

The heart of your floating shelves is the wood. This is where you get to express your vintage or coastal vibes. Think about the look you want to achieve:

Vintage Charm

  • Reclaimed wood: Give those old barn boards a new lease on life! The natural imperfections and weathered finish are perfect for that rustic vintage look.
  • Antique pine: Its warm tone and knots tell stories of a bygone era. Look for boards with a slightly distressed finish for extra authenticity.
  • Dark woods: Mahogany, walnut, or cherry stained in rich, dark hues create an elegant vintage feel, evoking classic libraries or antique shops.

Coastal Serenity

  • Driftwood: Embrace the ocean's bounty! Driftwood adds a natural, organic element with its unique shapes and textures.
  • Light-toned woods: Think bleached oak, pine, or maple. They create a light and airy feel, reminiscent of sandy beaches.
  • Coastal-inspired finishes: Whitewashing, distressing, or using a light blue or green stain can enhance the beachy vibe.

Bracing for Success: Choosing the Right Brackets

Your brackets aren't just holding up the shelves â€" they're part of the design! Choose carefully based on your style:

Vintage Flair

  • Iron or metal brackets: They offer a sturdy and industrial look, often with intricate details and finishes that enhance the vintage aesthetic.
  • Rustic wood brackets: Look for brackets made from reclaimed wood or with a distressed finish to complement your vintage shelves.
  • Vintage-inspired metalwork: Ornate ironwork, scrolled designs, or brackets with a hammered finish add a touch of elegance and history.

Coastal Chic

  • Marine-inspired brackets: Rope-wrapped, nautical-themed, or even shaped like seashells can add a touch of coastal charm.
  • White or light-toned metal brackets: They blend seamlessly with the light, airy coastal style.
  • Simple, minimalist brackets: Let the natural beauty of the wood and the coastal surroundings take center stage with sleek, unobtrusive brackets.

DIY Steps: Building Your Vintage or Coastal Floating Shelves

Now for the fun part â€" building your shelves! You'll need some basic tools and materials:

  • Wood for the shelves
  • Brackets (make sure they're compatible with your chosen wood thickness)
  • Screws (appropriate for the wood and brackets)
  • Level
  • Tape measure
  • Pencil
  • Drill
  • Saw (if you need to cut the wood to size)
  • Sandpaper
  • Finish (stain, paint, varnish, etc.)

Step 1: Measure and Mark

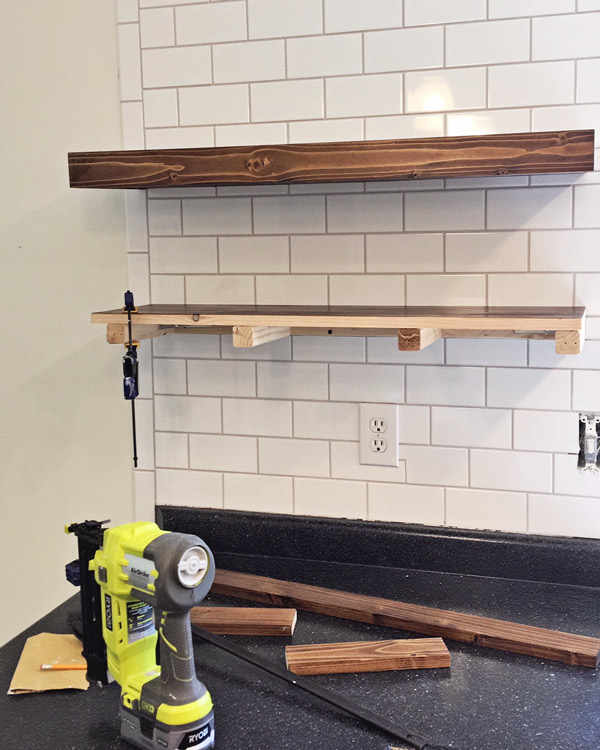
Decide on the placement of your shelves and the width you want. Measure carefully and mark the wall with a pencil. Make sure the brackets are spaced evenly and that the shelf is level.

Step 2: Install Brackets

Use your drill to pre-drill holes for the screws in the wall. This helps prevent splitting. Then, install the brackets, ensuring they're level and securely fastened. Remember to check if you're drilling into studs for extra support.

Step 3: Prepare the Wood

Cut your wood to size, if needed. Sand down any rough edges for a smooth finish. Apply your desired stain, paint, or other finishing touches. Let everything dry thoroughly.

Step 4: Attach the Shelves

Once your shelves are finished, attach them to the brackets. Be careful not to overtighten the screws. Check that the shelf is level and secure.

Styling Tips: Adding That Extra Touch of Vintage or Coastal

Now it's time to bring your shelves to life! Here's how to style them with a vintage or coastal flair:

Vintage Styling

  • Antique books: Add a touch of history with stacks of weathered books or antique journals.
  • Vintage photographs: Create a nostalgic feel with framed photos of loved ones or old family portraits.
  • Collectibles: Showcase your vintage finds â€" old clocks, porcelain figurines, or antique vases.
  • Rustic baskets: Add texture and warmth with woven baskets filled with throw blankets or decorative items.
  • Vintage-inspired lighting: A vintage pendant light or table lamp adds a cozy, warm glow to the room.

Coastal Styling

  • Seashells and coral: Bring the ocean indoors with collections of seashells, coral, and driftwood.
  • Nautical accents: Add a touch of maritime charm with anchors, compasses, or model ships.
  • Beachy textiles: Use woven baskets, seagrass rugs, or throws with nautical stripes or coastal-inspired patterns.
  • Coastal artwork: Frame prints of seascapes, lighthouses, or coastal scenes.
  • Live plants: Add a natural touch with plants like succulents, ferns, or seagrass.

There you have it â€" a guide to creating floating shelves with a vintage or coastal twist! Remember, the key is to let your personality shine through and create a space that you love. Have fun experimenting and enjoy the process of making your shelves your own! Happy building!